
WELCOME TO TRASK
Getting started with TRASK
About TRASK
TRASK is a location aware mobile application that allows you to track your activities in workplaces or places of interest. It’s purpose is to solve the problem of managing your time and activities and the creation of reports in spreadsheet format for later analysis and reporting.
If when you, your boss or your customers need to know, the time and the activities performed in an specific timelapse (day, month year) you:
- ♦ Perform a search for what you did through your mail, calendar, notes, or other tools?
- ♦ Do, you just try to remember?
- ♦ Perhaps, you just fill the information with schedules, places and activities in random mode?
- ♦ Do you think that fill this reports does not add value to your work?
- ♦ Would you like to automate this report with minimal effort?
If any of the above questions answered "YES", then we have great news…
TRASK IS FOR YOU!
This walkthrough includes the following sections:
- About TRASK Name
- Start TRASK
- Login
- TRASK Walkthrough
- The menu
- Projects
- Create a Place
- Activities
- Activity Reports
- How to edit or delete my account?
- How to export my timesheets?
About TRASK name
- The TRASK name is a combination of two words that allow us to understand what the application does.
- The first word is TASK because the tool allows us to keep a log of the tasks performed during the day.
- The second word is TRACK , because it allows you to audit your activities based on a time lapse.
Start TRASK
- To start TRASK in your phone, just click on the icon
Login
-
The login screen
- There are two options in the login page, the first one is to create an account, and the second one is to access the application with your credentials.
-
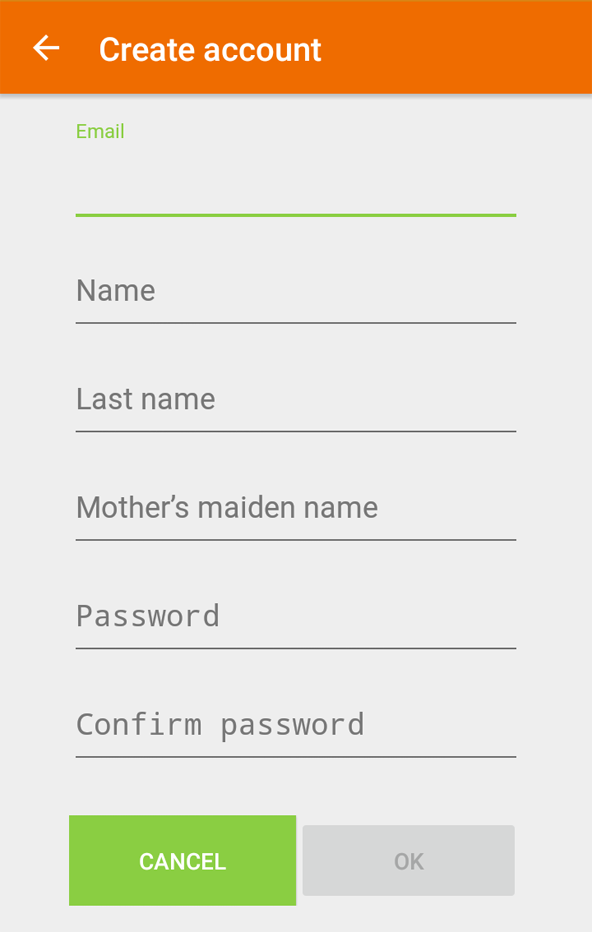
Don't have an account?
- In the login page select the “Create Account” option and fill the information needed.
 I have an account!
Sign in with your mail and password.
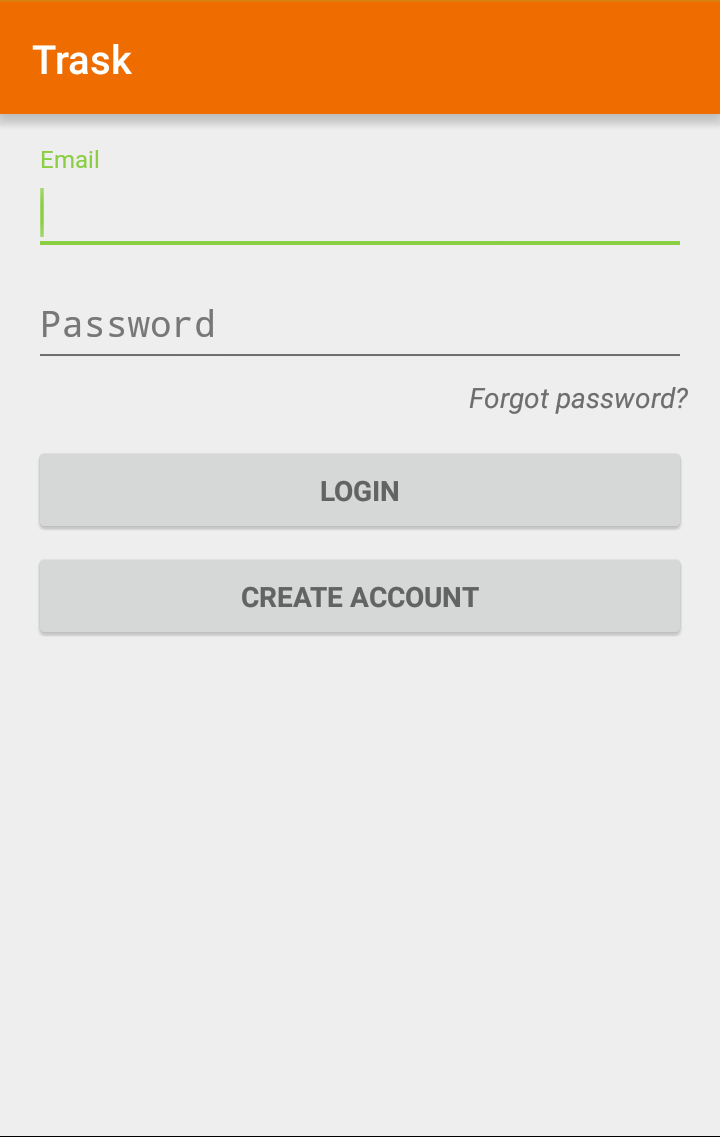 Forgot Password?
If you forgot your password, just select the “Forgot password?” link and follow the instructions.
TRASK Walkthrough
The following sections explain all the functionality and options available in TRASK for you to fully take advantage of all it’s functionality.
First Page Overview
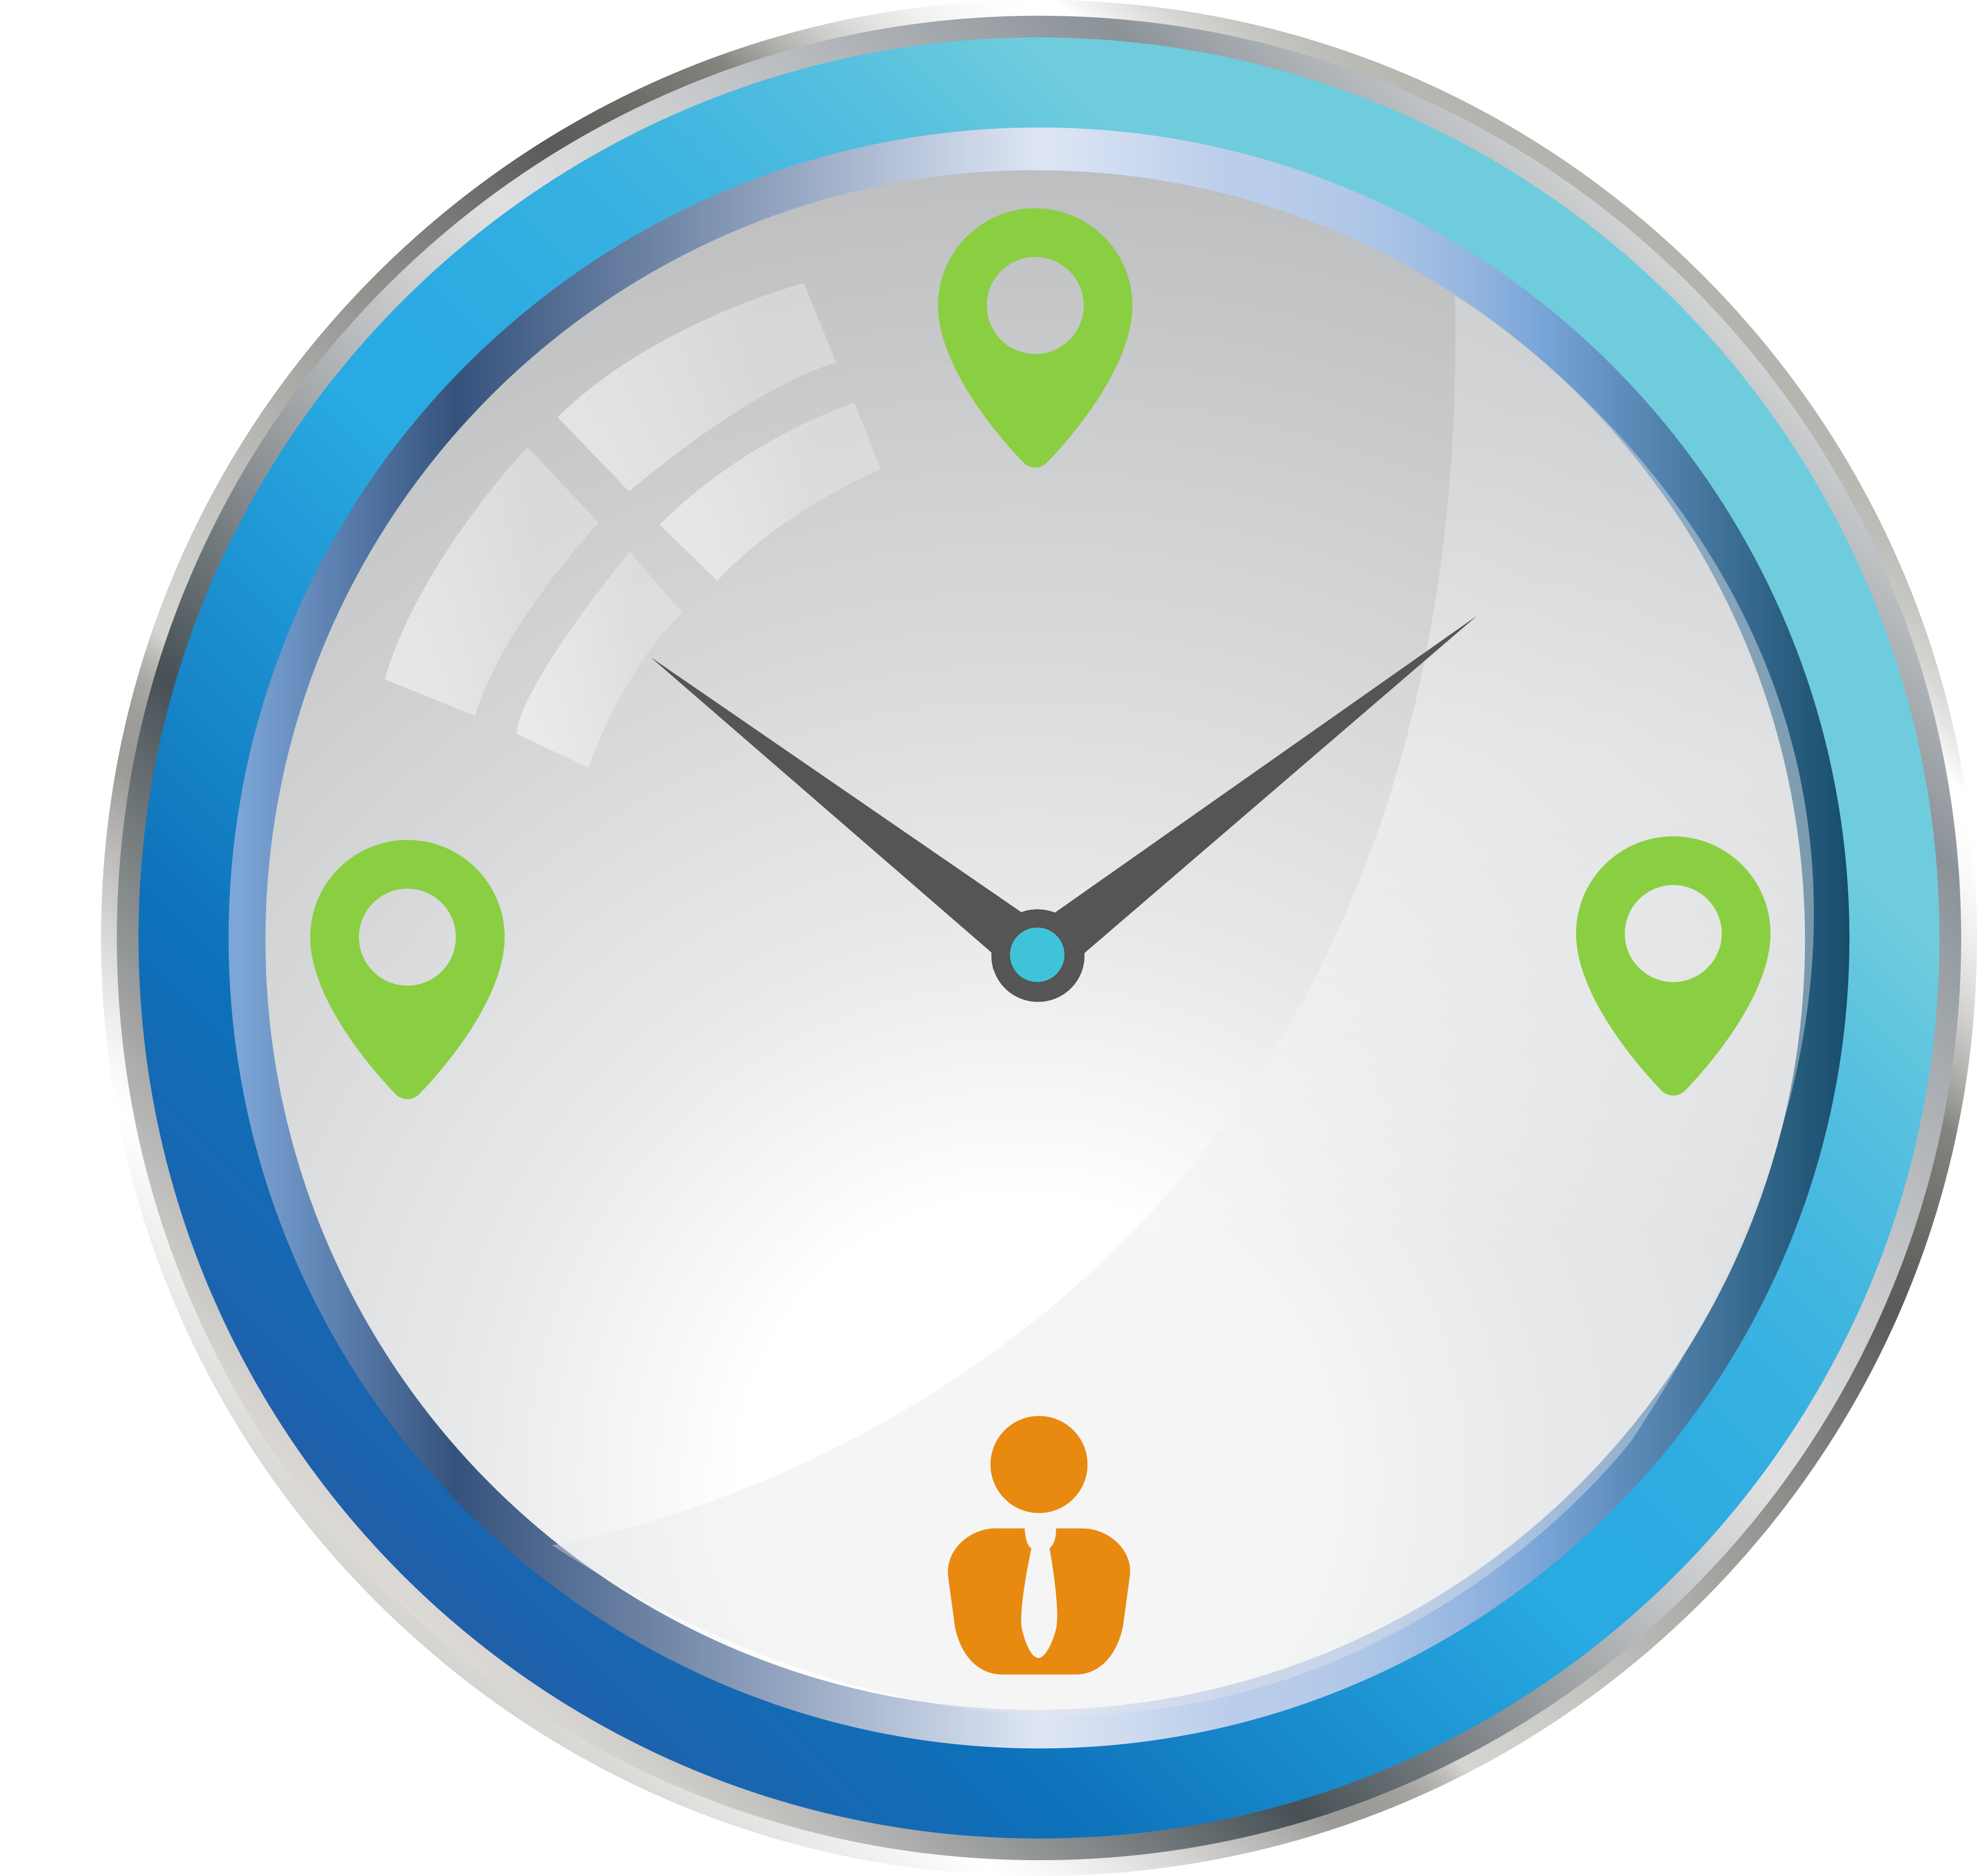
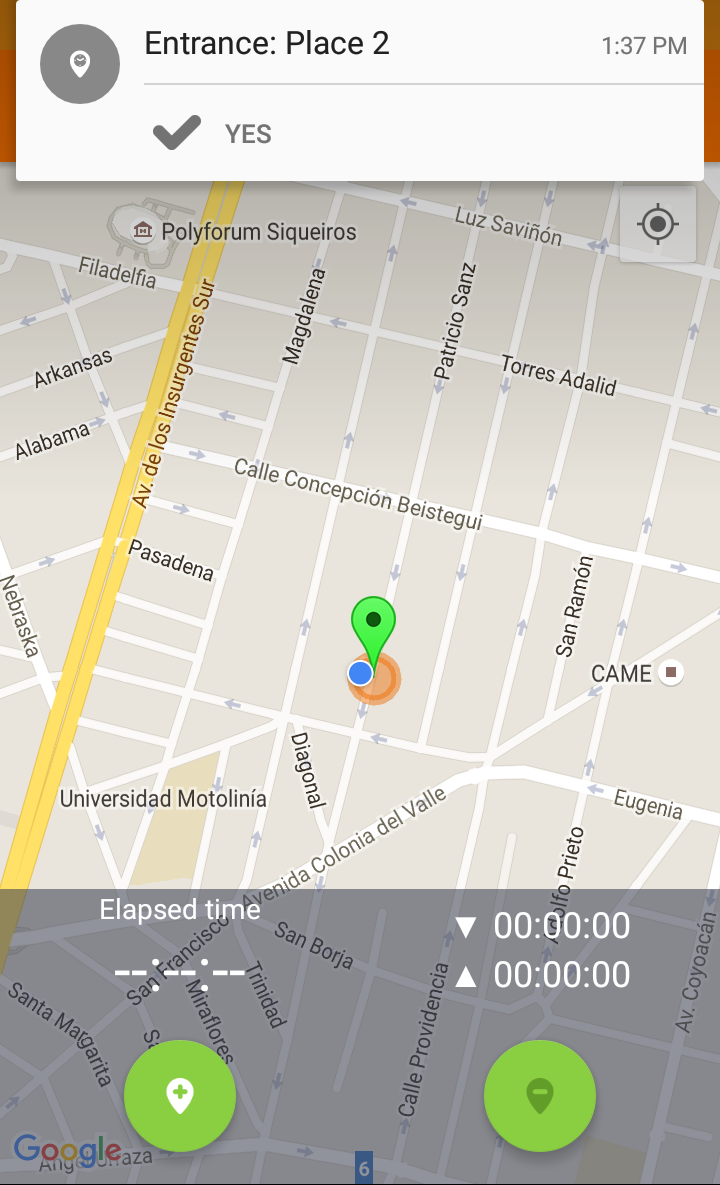
The first screen shows your current location in a map. Some indicators are shown on the map according the following:
|
A Blue Dot |
This is you in the map! |
|
An Orange Circle |
This is a defined Area, workplace or Place of Interest previously created in TRASK (see: how to Create a Project or Create a Place) If you (Blue dot) are inside the Orange area, this indicates that you have reached the point of interest and you can “check in” to the place. |
|
A Green Marker |
The green marker is the center of the orange circle, which indicates the exact center of the circle. |
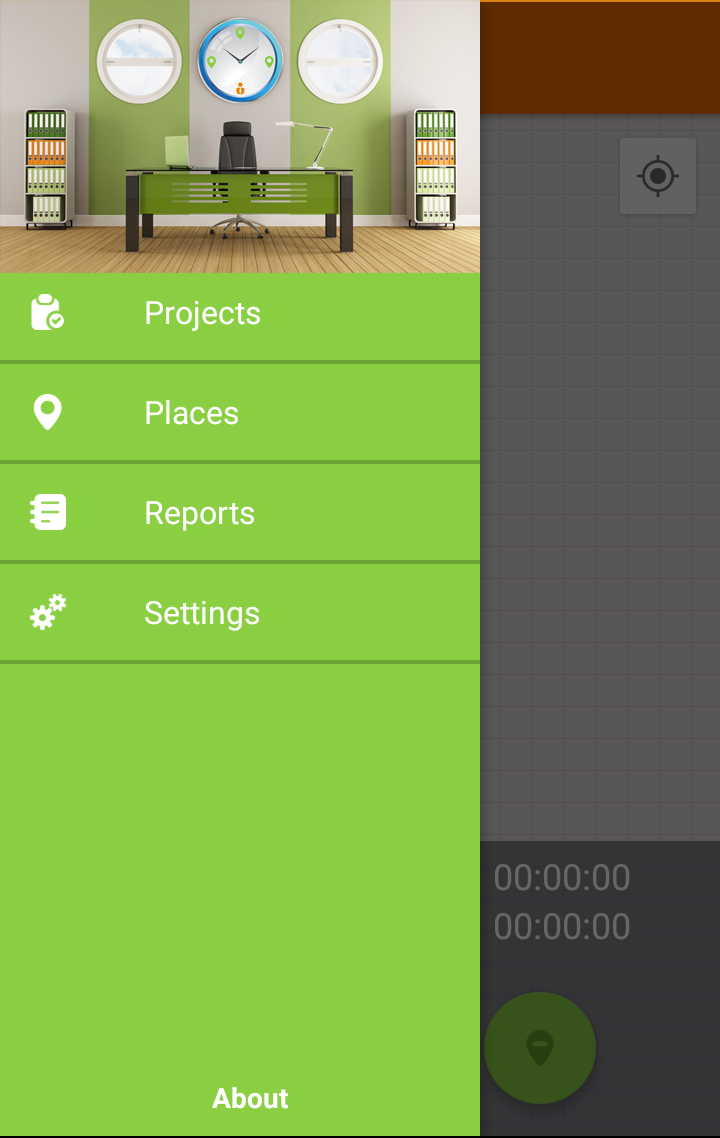
 The Menu
The application menu has 4 main options: Projects, Places, Reports and Settings.
|
Projects |
In TRASK a project is a target or goal. A project is made up of activities (description and duration), which you register and are necessary to do in order to achieve that goal. Despite all activities belongs the same project, they can be made in different places. |
|
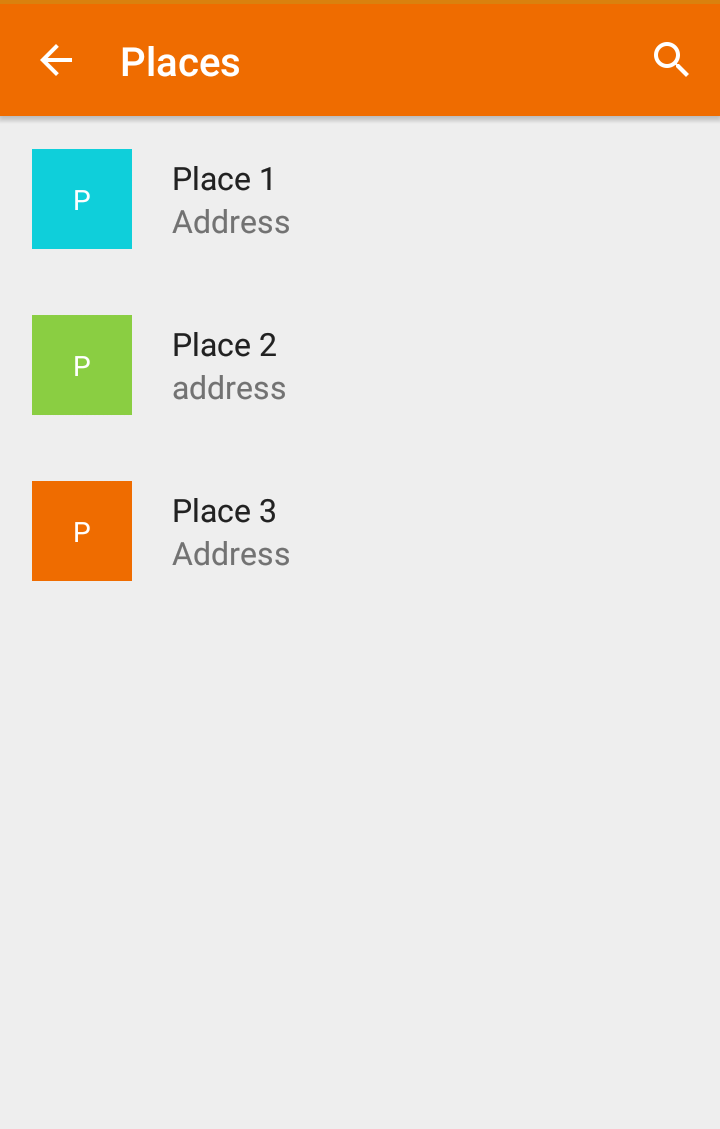
Places |
Is a location to execute activities related to a project. You can have one or more Places assigned to a project. |
|
Reports |
In this menu you will find all the activity reports related to your projects. You can search your activity reports per day, month, year, project and additionally you will see a chart with the percentage of time spent in each project. |
|
Settings |
In this page you can edit your name, time update interval, password, close your current session and export the activity reports. |
Projects
Create a project
- To create a project, select in the menu “Projects”, this will open a new screen listing all your registered projects, the description and the time spent in activities related to that project (Days and Hours).
- Additionally in the top of the screen there is a search icon to find (filter) by the project’s name.
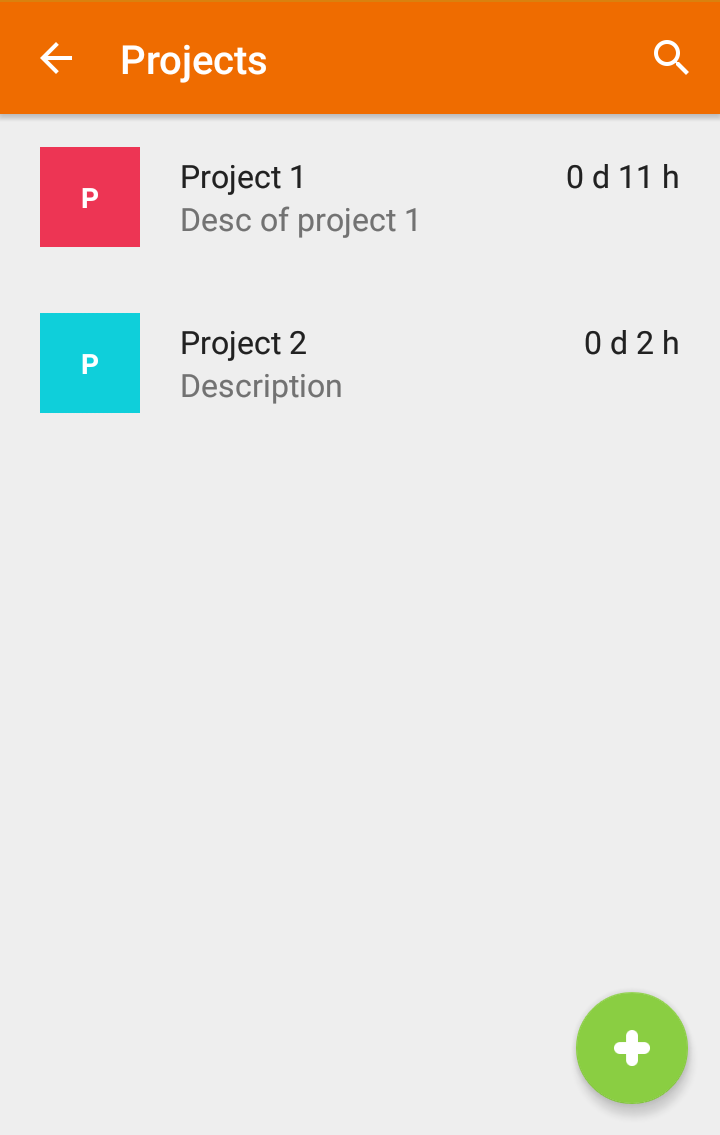
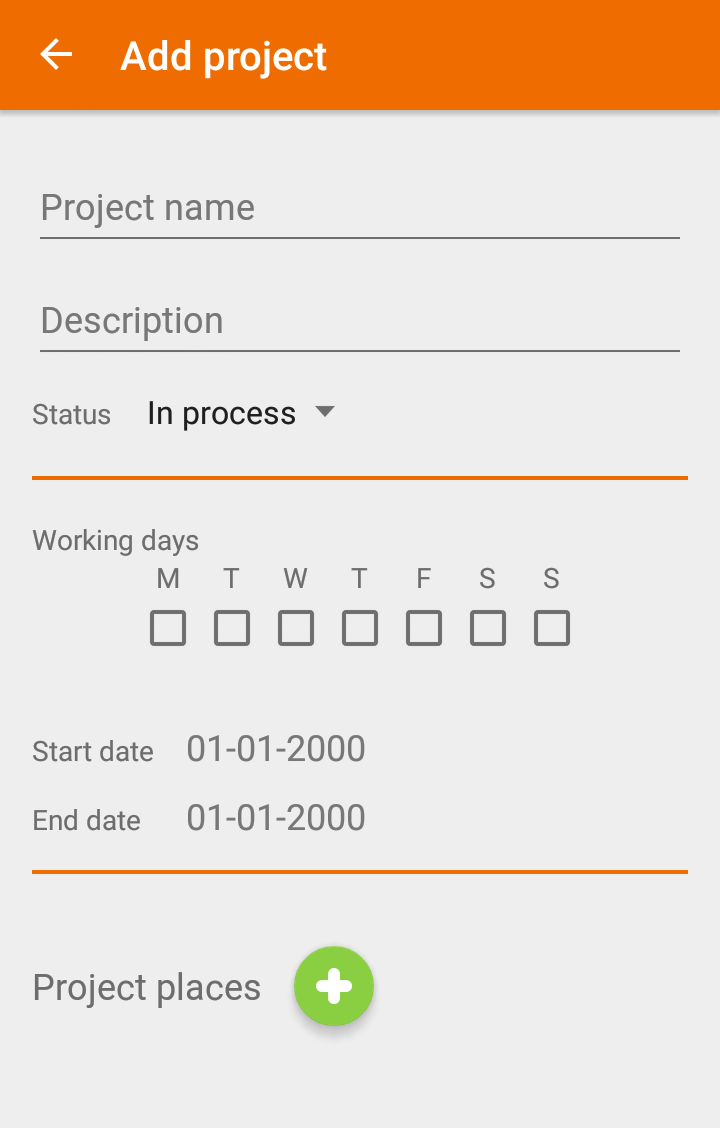
If you want to create a new project, select the plus icon (+) at the bottom of the screen, and fill the required information.
|
Project Name |
It is a name you give to your project |
|
Description |
Brief description of the project |
|
Status |
You can select two options:
|
|
Business Days |
Define what days are you going to work in the project |
|
Start and End Dates |
When was or will be the start and end date of the project? |
|
Locations |
You can create a new or select a previously created location for this project. |
To save your project, just select “ok” button at the bottom of the screen.
Edit or Delete a project
There are two methods:
- You can go to the “Projects” menu and select the Project. At the top of the screen, select the pencil icon to edit all the project’s information, or the trash icon to delete the project (IMPORTANT: Deleting the project erases all the related activities, if you want to keep a backup of that information, you should perform an export before - read: how to export data).
- You can edit or delete a project, going to the “Project” menu, then in the Projects list hold for a few seconds the Project of interest, this action will enable the edit and delete mode at the top of the screen (pencil and trash icon).
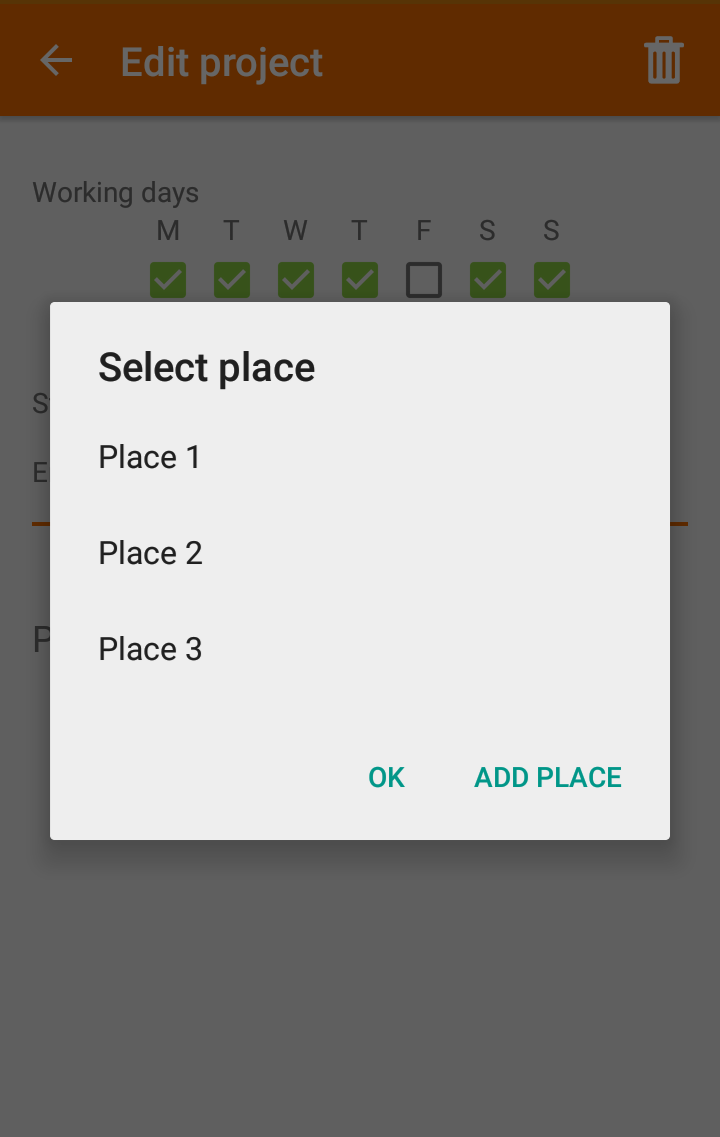
Create a Place
- Locations can be created only from within each "project" (as seen in the previous section). Creating or editing a project, allows you to attach new places to it.
Create a new Place
- You need to select a project where you want to add a new place.
- Once you are in the project view, at the top of the screen, select the pencil icon to edit the project’s information.
- When you are in "Edit Mode" you can add more locations related to the project.
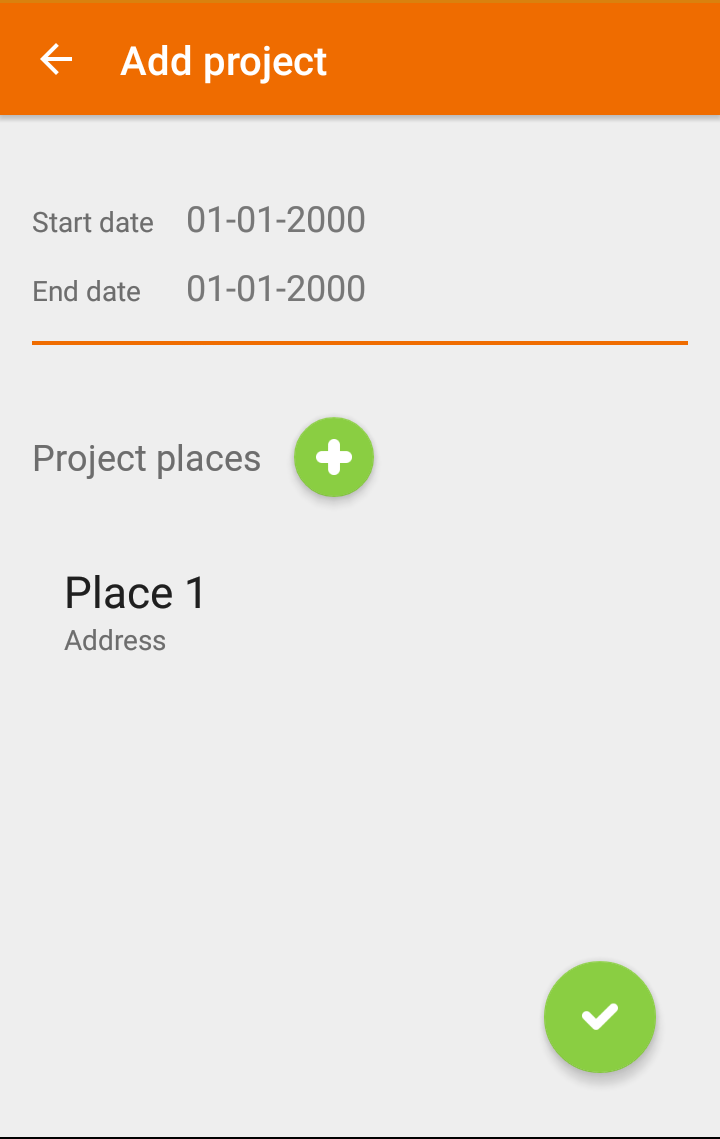
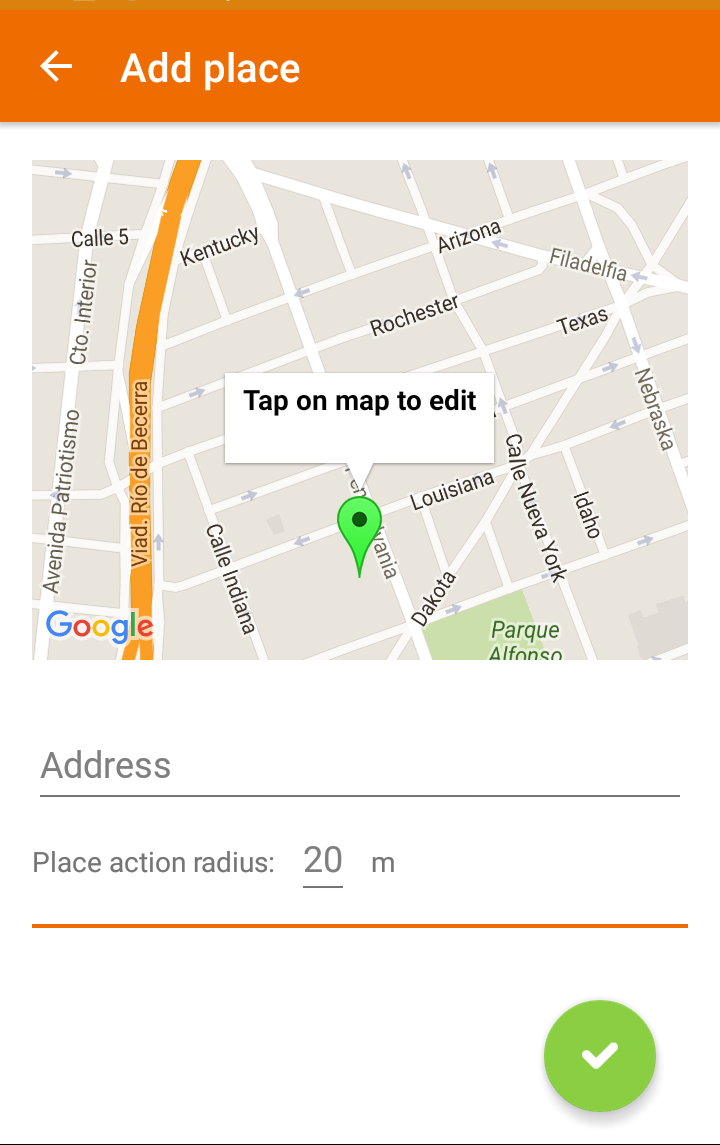
- If you select the “New Place” icon, a new screen will pop up with all the required fields of the Place, like name, description, business hours, and location.
- You will see a map showing your current location, to save it as Place position or,
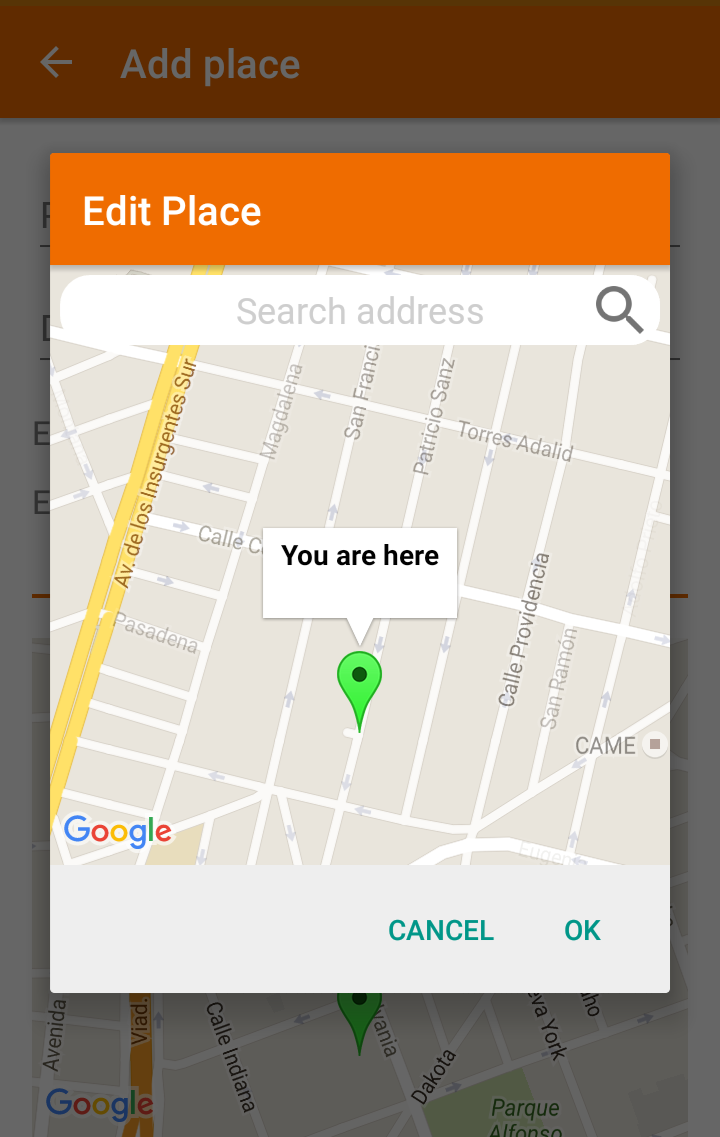
- If you want to select manually the location in the map, you can:
- ♦ Type the address in the search field or
- ♦ Search manually for a location sliding the map to set the desired position
- Also the Place requires a radius metered in meters (Orange Circle), this value indicates the size of the area representing the Place.
To save the changes you have to select the "OK" button at the bottom of the screen:
Edit or Delete a Place
There are two methods:
1. You can go to the “Places” menu and select the place. At the top of the screen, select the pencil icon to edit all the data related to the place.
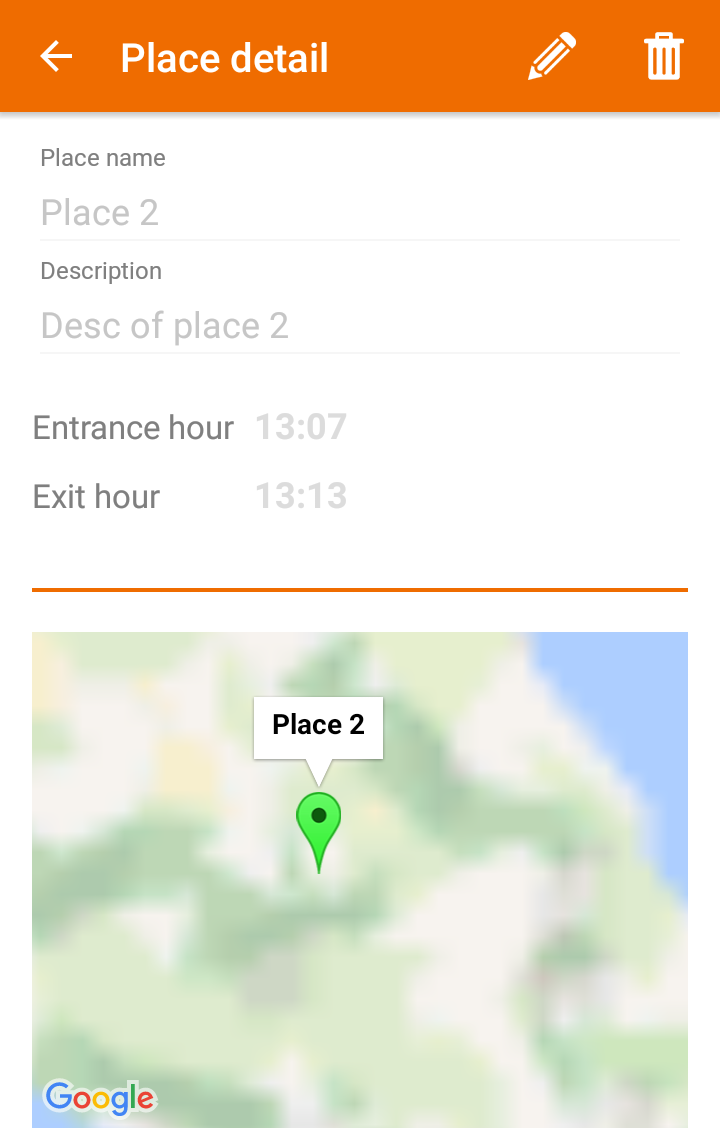
2. You can edit or remove a place, going to the “Places” menu, then in the Places list hold for a few seconds the Place of interest, this action will enable the edit and delete mode at the top of the screen (pencil and trash icon): 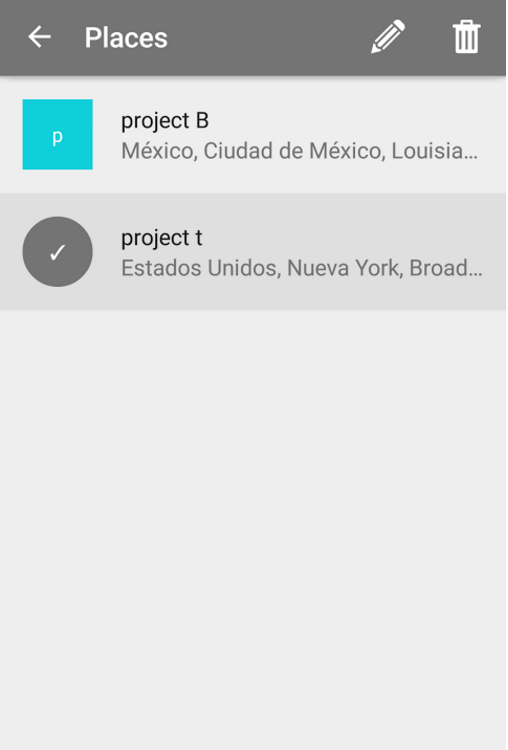
Check In a place
- You can “check in” to a Place/Project in two ways.
- 1. The first one is manually pressing the “check-in” button in the home screen (green circle in the left).
2. In the second method, when you are located in a saved Place you will receive a push notification in your mobile. From the same notification you can select the “check-in” option.
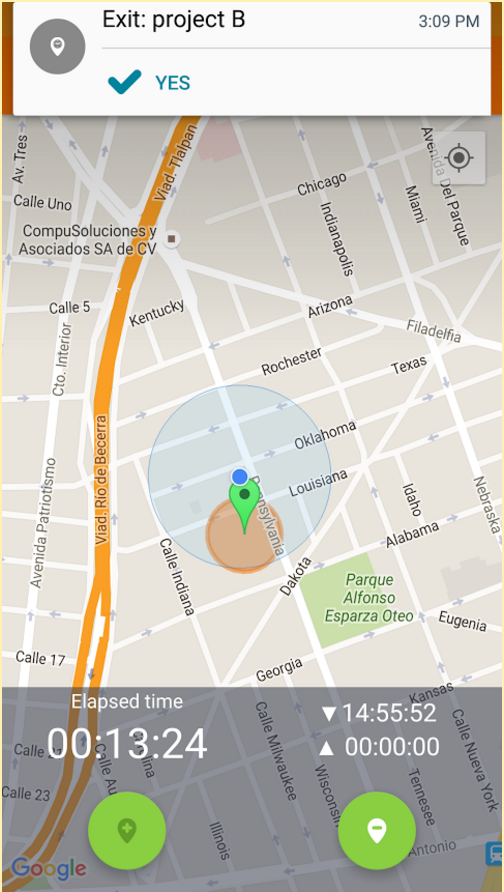
Check Out from place
- You can “check-out” from a place on the same two ways you checked in.
- Manually with the green circled button on the right side of the main screen.

- The second option is through the push notification received when the device detects that you are out of the Place (Orange Circle).
Activities
- You can add activities for ANY project in 2 different ways:
-
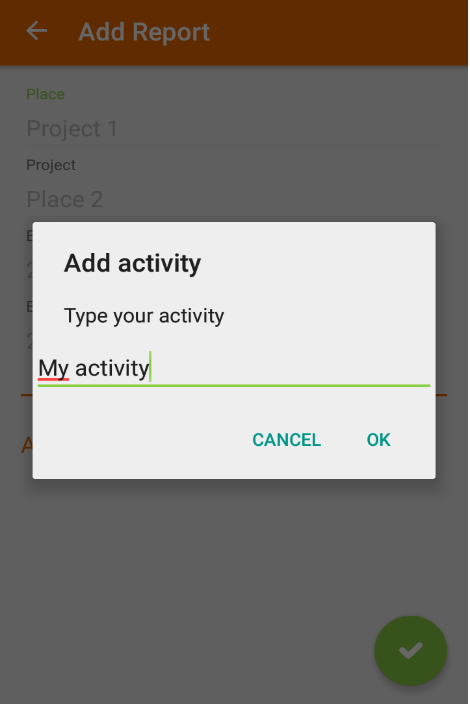
Add an activity during checking out
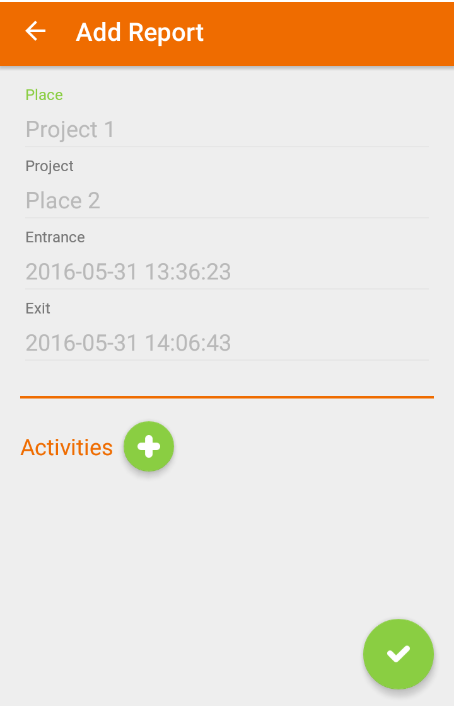
- Every time you “check out” from a place, a report will be generated and you will be asked to add the executed activities.
- You can add many activities as needed.
- For adding an activity just type the activity and press “OK”.
- For adding more activities just press the plus (+) icon.
- Confirm the activities and save the Report with the “OK” icon at the bottom of the screen.
Add an Activity at any time
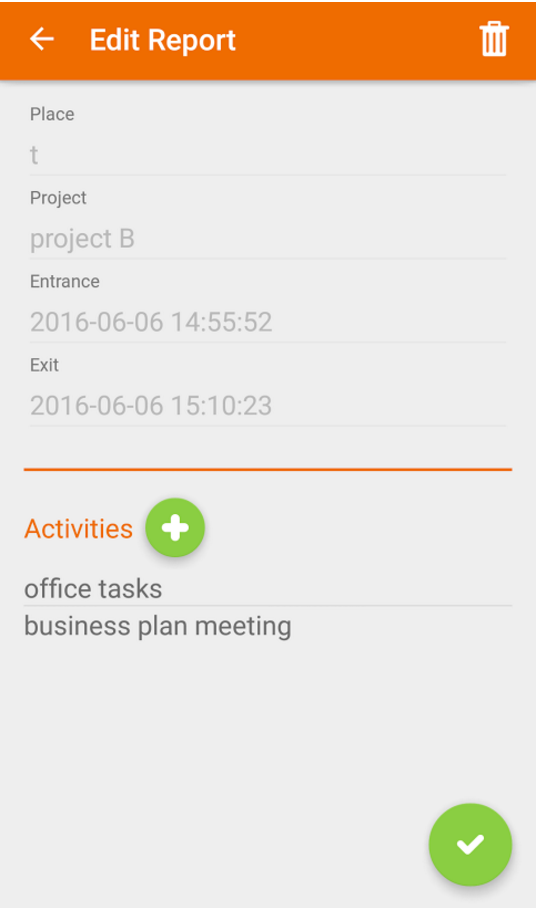
- You can add the activities performed in each project even when you’ve already “checked out” from a Place, to do this you have to go to the Reports menu.
- Within the Reports menu, you need to search for the specific report to modify and select the report. With this you will see all the specific data about the report.
- In the top right of the screen select the edit icon (pencil), with this you can add as many activities as required.
Activity Reports
- Within the "activity report" menu, you can search for each day, month or year the executed activities in any project.
- The screen looks like the following:
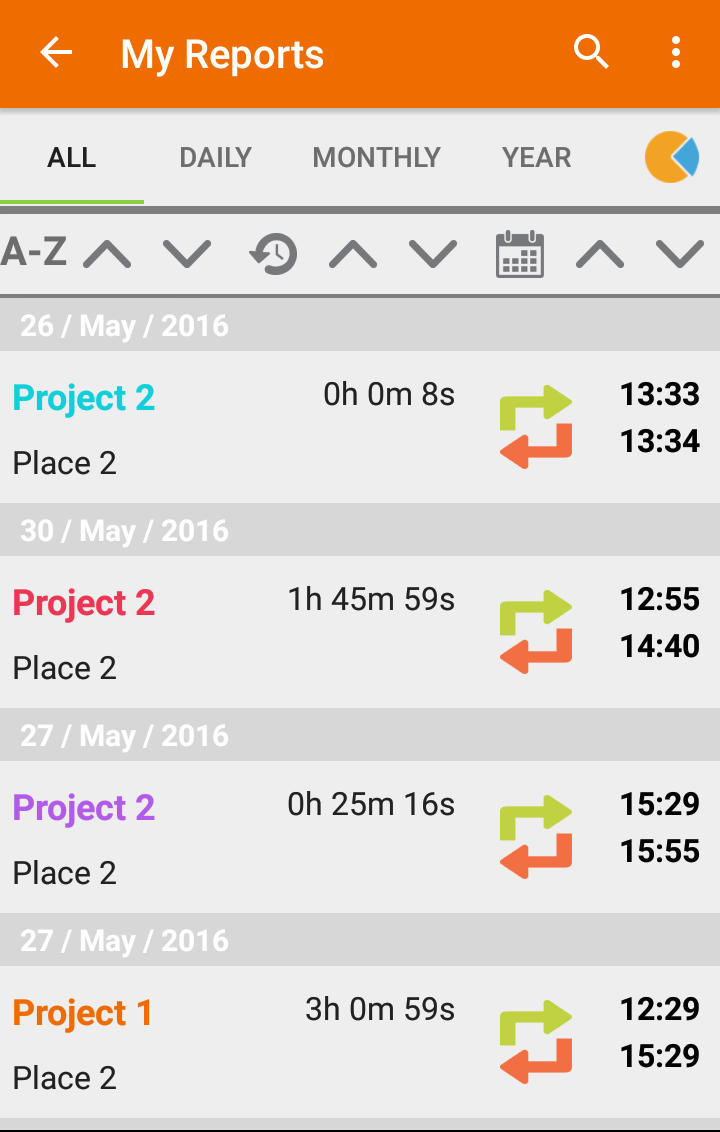
Filter by ALL/DAY/MONTH/YEAR
At the top of the screen you can find filters to find a specific activity report.
|
ALL |
Retrieve all the projects with executed activities |
|
DAY |
Retrieve the projects with activities executed in an specific day |
|
MONTH |
Retrieve the projects with executed activities in an specific month |
|
YEAR |
Retrieve the projects with executed activities in an specific year |
Order by (Alphabetically, Execution Duration, Date)
The following screen options are to sort the reports:
|
Tap the up or down arrows to order the results alphabetically |
|
|
Tap the up or down arrows to order the results by execution duration |
|
|
Tap the up or down arrows to order the results by date |
Query Activity Reports
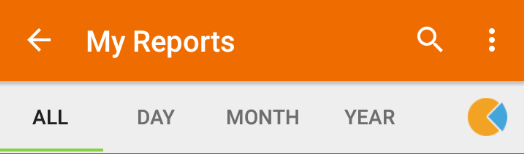
|
|
On the top of the screen you can find a search icon, by tapping this icon you can type the name of the project or place you are looking for, and the list will be filtered automatically. |

Export All and Delete All / Activity Reports
|
|
The app allows you to Export All or Delete All the recorded reports.
|
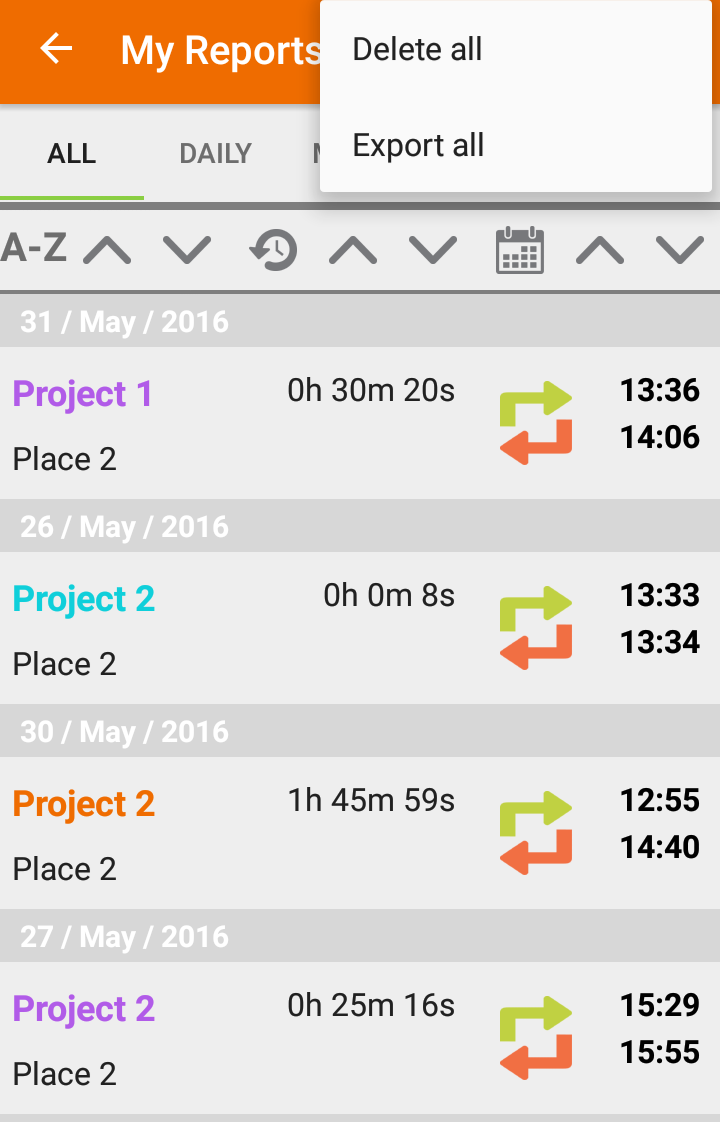
EXPORT ALL
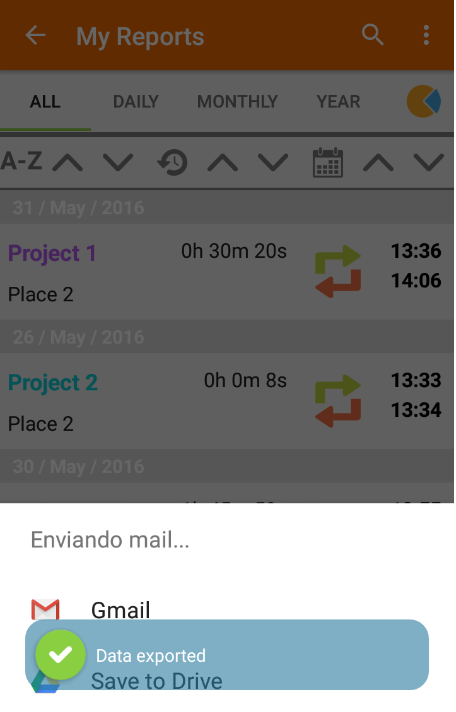
- The Export All option creates a CSV (Comma Separated Values) file and can be shared by email, cloud services, or to another other apps.
- To export your reports, go to the reports screen and select the options icon.
- Select “export all” and follow the instructions.
Delete all
- This option deletes all the activities recorded in the TRASK application.
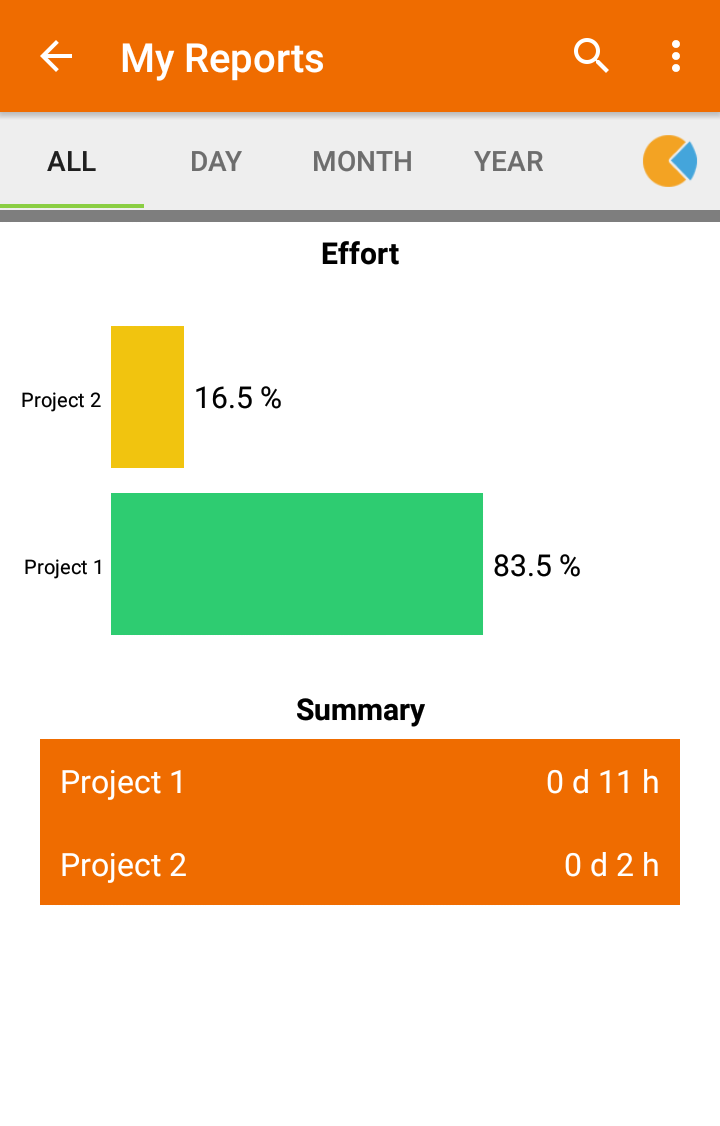
Charts
|
|
The pie chart icon option allows us to graphically visualize both, the effort spent on each project (as a percentage of total time) and the summary of the time spent on each project. This is an example of the charts |

 How to edit or delete my account?
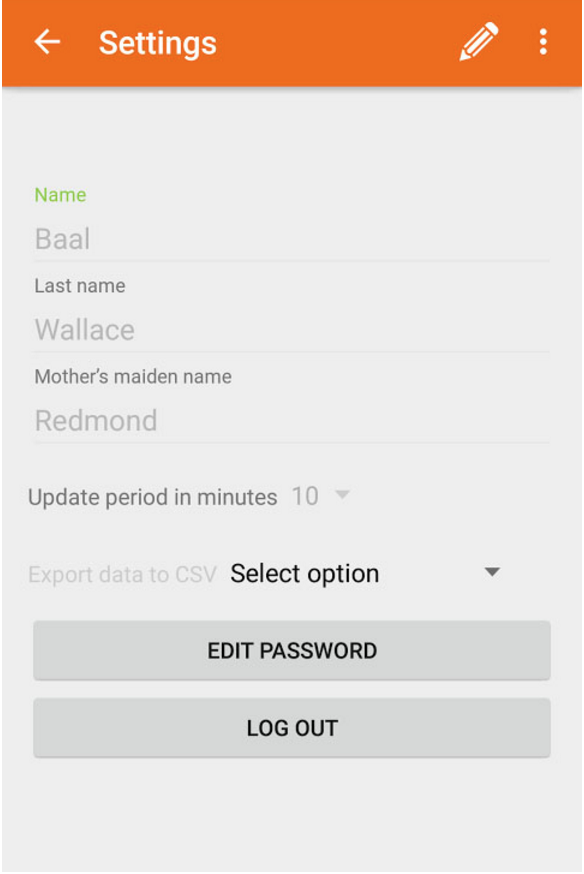
In the main menu, select “settings”, in this section you can modify:
|
Name |
Your personal information. |
|
Update time in minutes |
This is the time when the application updates the actual location and checks if we enter or leave a previously saved place, be wary as setting this option to a very low value will undermine your battery’s duration significantly but a very long time may take a while to identify your arrival to a configured place. |
|
Export data to CSV |
If you need to deliver a file with all your executed activities, you can export all the records with this option. This creates a CSV (comma separated value) file, that you can share it by email, message or another application as an attachment. |
|
Edit password |
With this option you can edit your account’s password. |
|
Logout |
This close the application session. |
|
Delete account |
In the top of the settings screen you can select two options:
|
How to export my timesheets?
- Select “Settings” in the main menu, here you can choose the option “Export data to CSV”.
- With this you can export all the time reports in the application, creating a CSV (comma separated value) file. The application will give you some options to share the file.
Do you need help?
If you require more information about TRASK or you have problems with the application, feel free to contact us to This email address is being protected from spambots. You need JavaScript enabled to view it. or This email address is being protected from spambots. You need JavaScript enabled to view it.